


どうも、YUKIです。今朝シャワーを浴びる時に体重を測ったら、過去最高を更新していました。昨日の努力は何処へやら。

さて、今回はGarageBandで作った曲(まだ曲って程でもないですけど)を、GarageBandを持っていない人にも聞いてもらう=一般的なフォーマットに書き出す方法をご紹介します。
Now, I will show you how to export a song (not so much a song yet) created in GarageBand to a common format so that people who do not have GarageBand can listen to it.
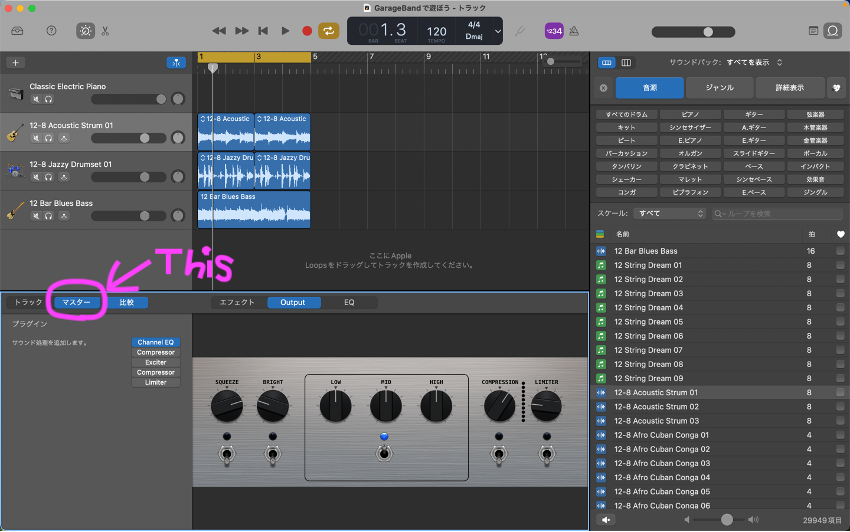
実は、書き出す前に全体のバランスを整える必要があります。GarageBandは全トラックの音を一括で調整するミキサーが無いのですが、図の丸で囲った部分に「マスター」という項目があります。ここで全トラックのバランスを調整することができます。
In fact, before exporting, it is necessary to adjust the overall balance. Here you can adjust the balance of all tracks. GarageBand does not have a mixer to adjust the sound of all tracks at once, but there is an item called “Master” in the circled area in the figure. Here you can adjust the balance of all tracks.
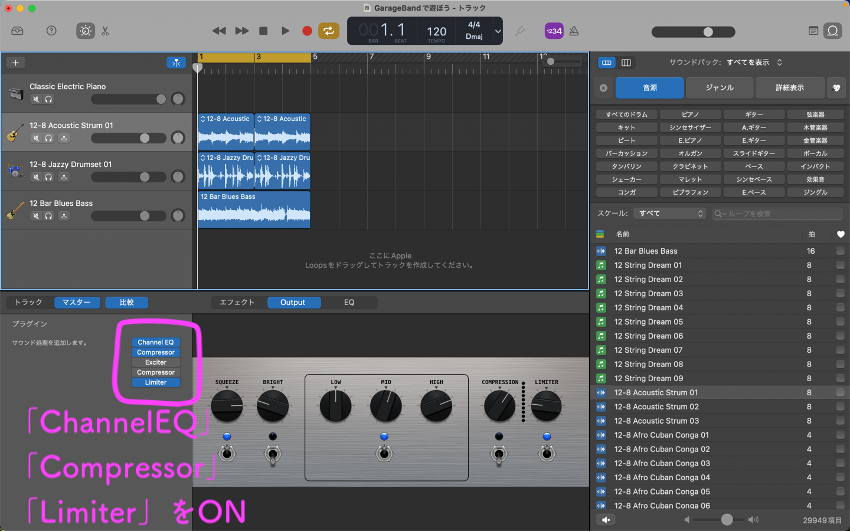
今回は「Channel EQ」「Compressor」「Limiter」をオンにします。
Now turn on “Channel EQ”, “Compressor”, and “Limiter”.
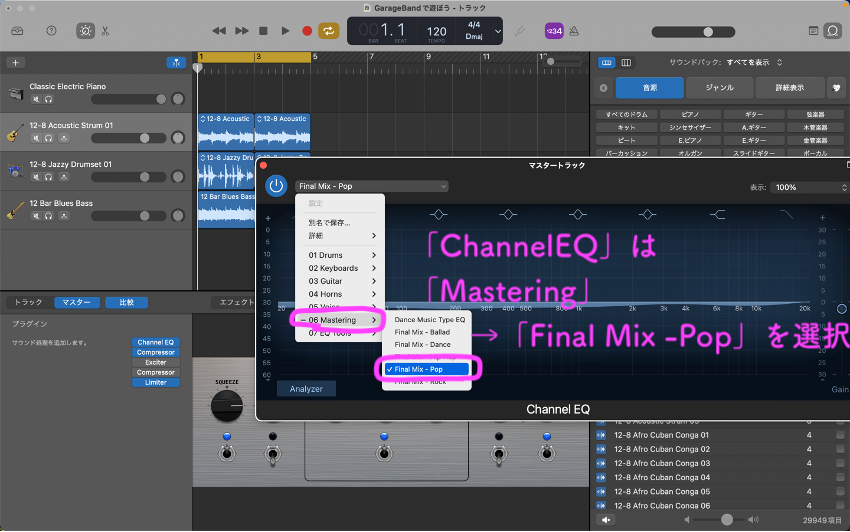
Channel EQ」は、「Mastering」→「Final Mix – Pop」を選択します。
For “Channel EQ,” select “Mastering” > “Final Mix – Pop.
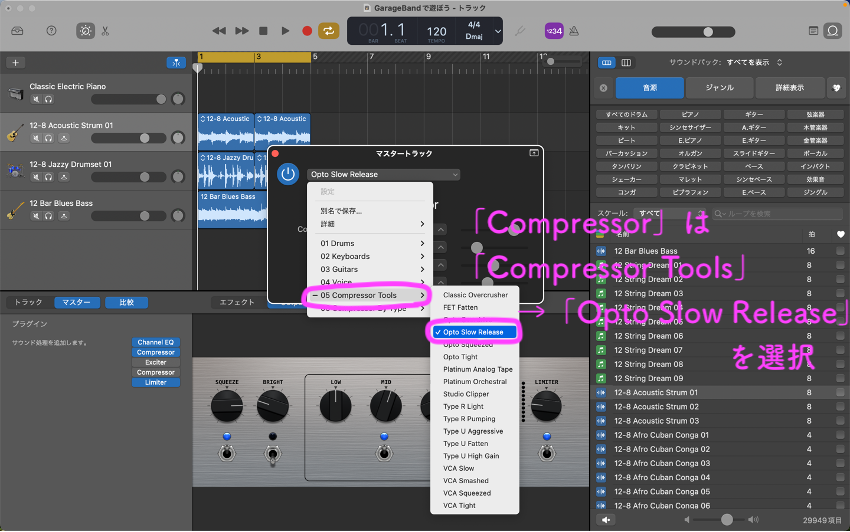
「Compressor」は「Compressor Tools」→「Opto slow Release」を選択します。
For “Compressor”, select “Compressor Tools” -> “Opto slow Release”.
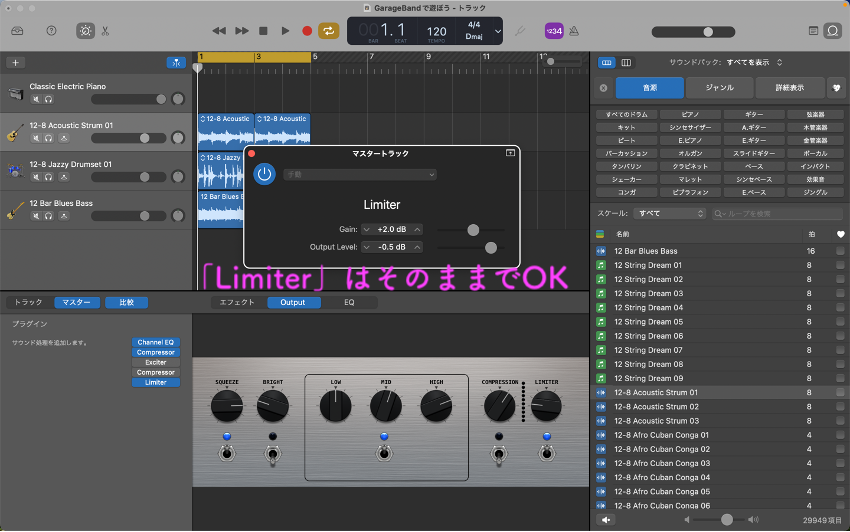
そして「Limiter」は、読み込んだそのままの設定でOKです。
And “Limiter” can be set as loaded.
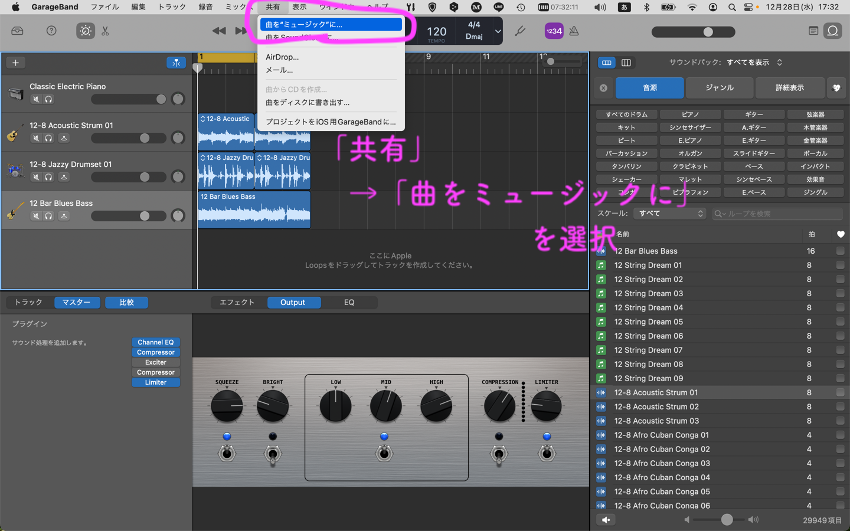
ここまで出来たら、いよいよ曲を書き出してみます。「共有」→「曲をミュージックに」を選択します。
Once you have done this, it is time to export the song. Select “Share” -> “Songs to Music”.
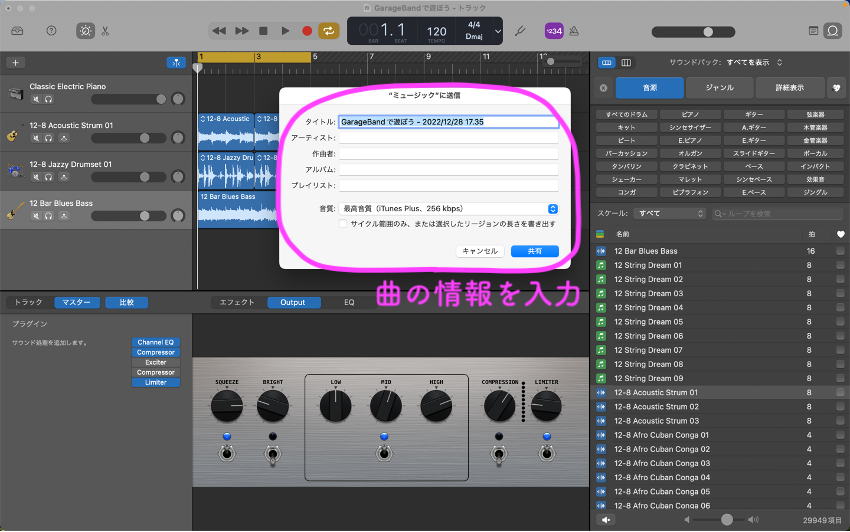
既に曲のタイトルが入っているので(すっげえ事務的なタイトルですけど(笑))そのまま使います。音質も選べるんですけど、初回記念ということで?最高音質で書き出しましょう。
The title of the song is already in the file, so I’ll use it as it is. You can choose the sound quality, but since this is the first commemorative edition? Let’s export it with the highest sound quality.

「共有」を押すと、iTunesが起動します。自動で「GarageBand」というプレイリストが作成されて、そこに書き出した曲が追加されます。
Press “Share” to launch iTunes. A playlist called “GarageBand” is automatically created and the exported songs are added to it.
今回はここまでにします。次回は、その他の様々な書き出し方法について解説します。
That’s all for this issue. In the next issue, we will discuss various other export methods.
現場からは以上です。
That’s all from the field.

コメント